
Sunday, May 10, 2026
Monday, February 03, 2025
Sitting waiting for his friend!
I got this pattern from @lisa_pay_artist patreon and picked out my blue fabric to make him blue robot. Took me a while to make it as I started it back in later November 2024. But so happy with how it turned out and how great #lisa_pay_artist video instructions were to follow. Think i want to make it in Red next so they can sit together


Monday, February 05, 2024
Steamp punk quilt trapuntoed
Here is a quilt i made Neal back last November that we have just hung up


Sunday, December 31, 2023
Gnomes gone to their new home
Christmas came and went , and i must have been a naughty girl this year as I got covid for Christmas. I did manage to get these two gnomes made and given before i got covid. And the ford one was made for a person who did not like gnomes (as many were appearing in the house) BUT now likes them LOL


Sunday, September 03, 2023
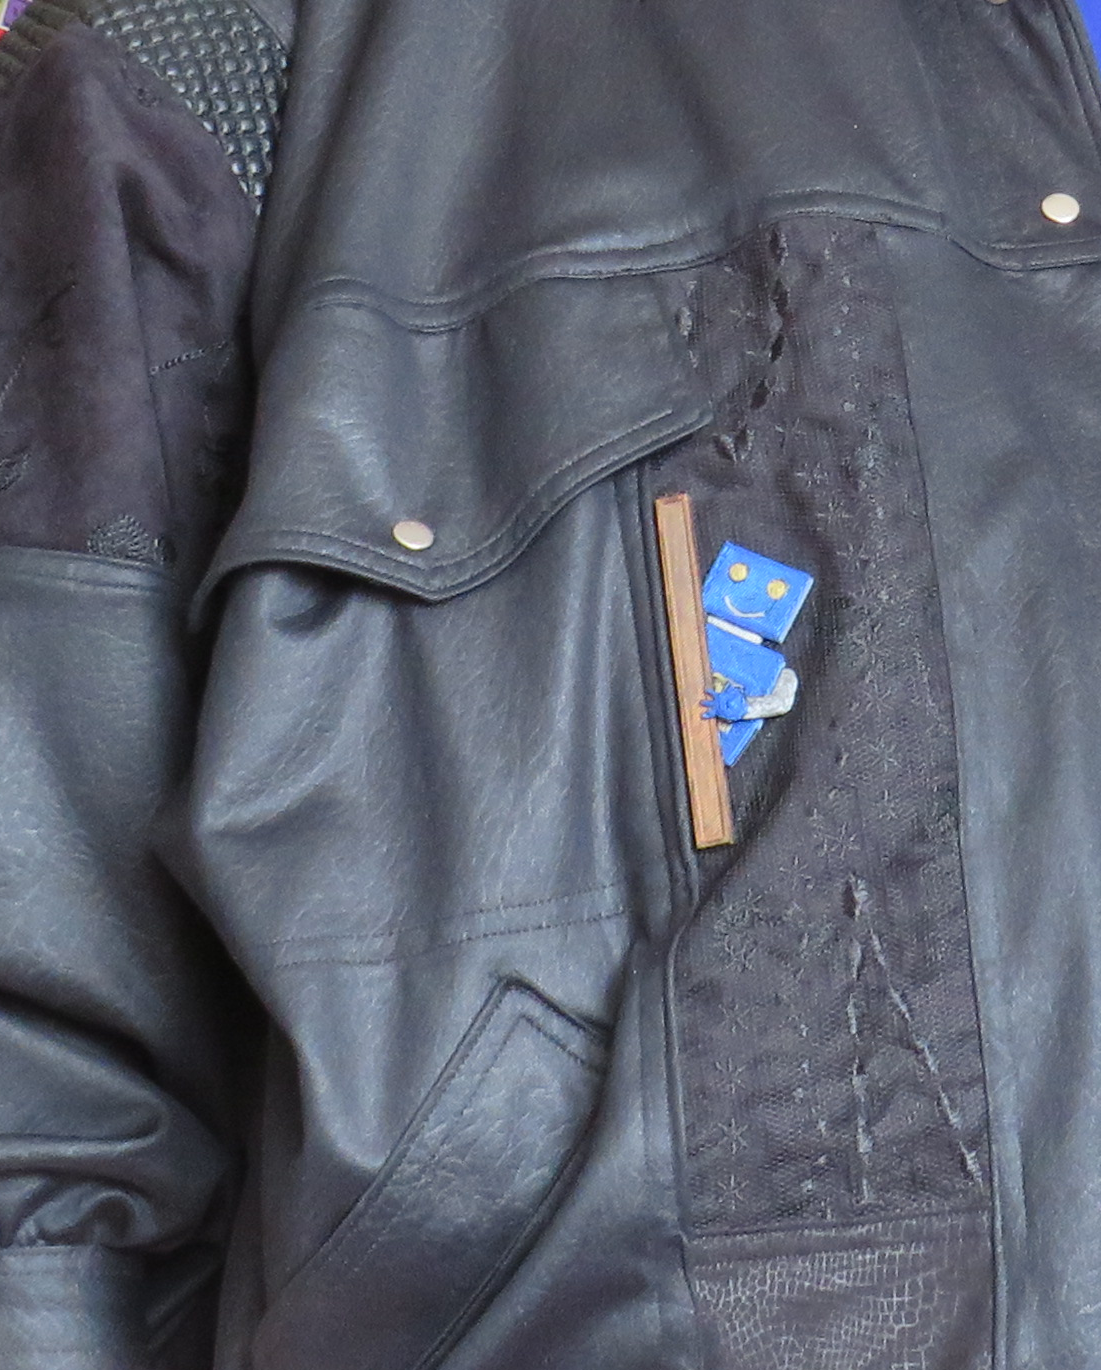
34 year old jacket is now wearable again
Many years ago I made a black jacket (I was way smaller the), But i could never bring myself to throw it out. Last month i got the jacket out of the cupboard and unpicked lots of the seams and collected all my favorite black fabric i had and remade my jacket. Also added a 3D printed robot (that i had printed the netting fabric into the print)


Saturday, July 29, 2023
New toy and out of that new toy comes my ROBOT
No
guesses as to what our houses new toy is . Yes we now have a ender 3
3dprinter and here is our first attempts . Firstly the cat printed just
the bottom section before failing. Then after a little play we got it to
print a full cat. Ok then a fan cover after we adjusted the temperature
and did up a screw or two .
What was I always going to print next?
My own robot design but first attemped ended up having to be stopped as i
did not put supports in it (lucky i seen that early on!) and will use
that as a flat robots put together with misprints. So I then printed my
robot with the supports and I am loving it for a first try.


Sunday, July 09, 2023
Ford Quilt
i made this for my friends husband. I pieced the quilt then quilted it and but then cause of the white fabric i used i had to appliqued the logo down


Thursday, June 22, 2023
Seeing pink Elephants
After making the blue elephant lap quilt the other week I wanted to make my friend one in her favorite colour so I did it but this time instead of doing it in squares i did it as paper piecing


Thursday, June 01, 2023
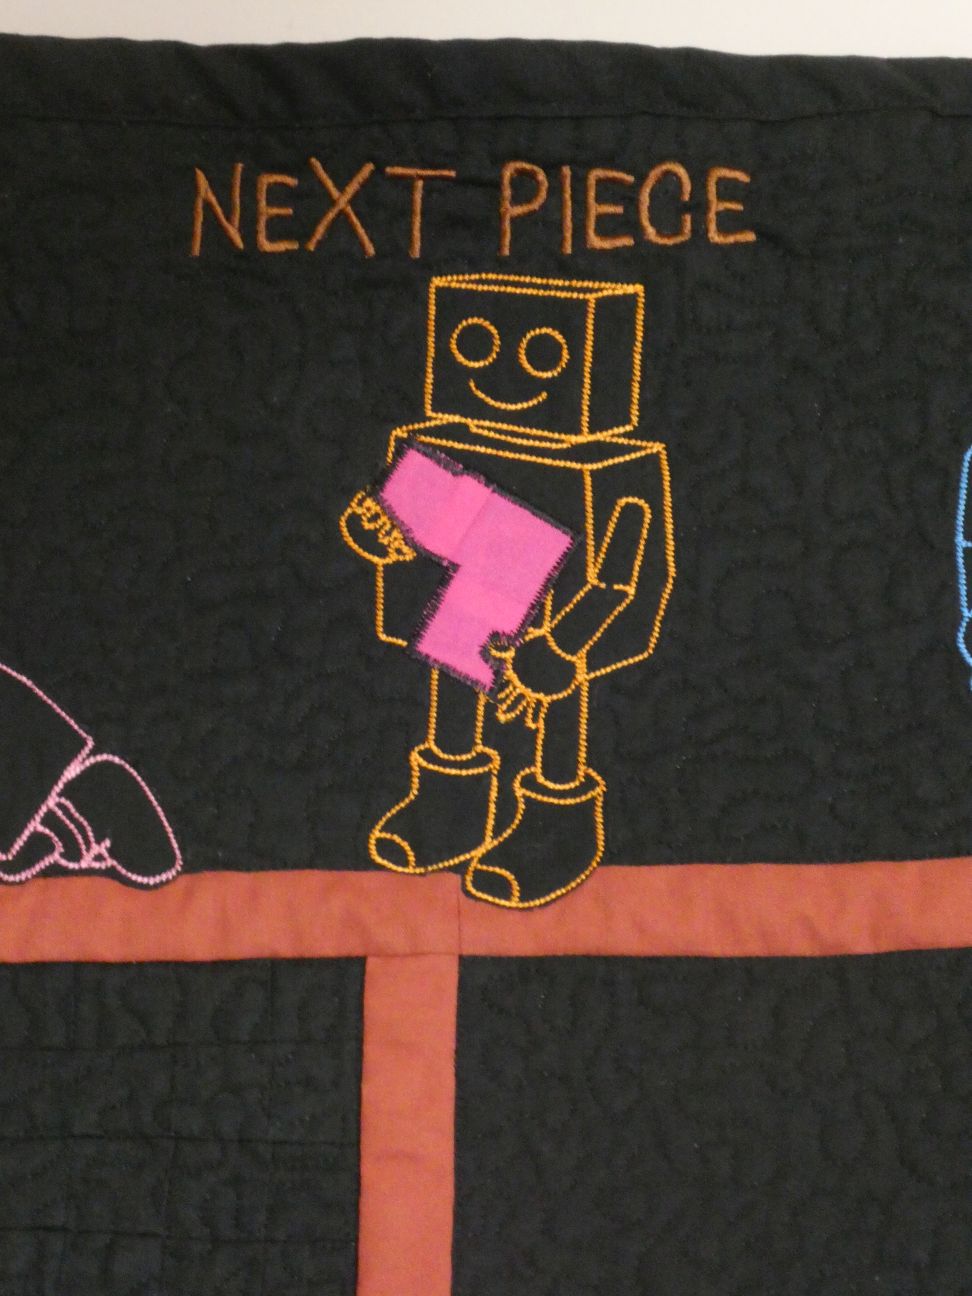
Tetris Quilt
Here is my latest quilt i have made.
I designed the robot in blender 3d, posed it into the way i
wanted them then took the photos into embroidery software and turned them into
robots i could sew out on the embroidery machine


Sunday, May 21, 2023
Sea turtle Quilt
story about the turtle quilt when i was making it I hated it there was too much plain blue and it was too flat so i cut the back of the turtle off and stuffed it , then it was just so so . Then i painted the sea grass and bubbles and it was getting better. Then i added the 9 small turtles and i had turned a quilt that was going to be thrown out the window to a quilt i love


Friday, April 28, 2023
Love bots
I designed the piecing pattern using quilting assistance program inspired by a bookmark cross stitch kit I have. Pieced it together on my brother machine and quilted in on my capri long arm machine


Subscribe to:
Posts (Atom)